Homemade Coffee Whipped Cream: Secrets for Fluffy Perfection
Imagine transforming your everyday coffee into a luxurious café experience or elevating a simple dessert into an indulgent masterpiece, all with just a few ingredients and a few minutes of your time. That’s the magic of homemade coffee whipped cream. Forget the bland, store-bought aerosols; we're talking about a cloud-like, intensely flavorful topping that adds a touch of pure bliss to any treat. It’s light, airy, delightfully sweet, and infused with the rich aroma of your favorite brew.
Making your own coffee whipped cream isn't just easy; it's a revelation. This guide will unlock the simple secrets to achieving that uber-fluffy perfection, ensuring every dollop is a dreamy, melt-in-your-mouth experience that will have you wondering why you ever settled for anything less.
Why Homemade Coffee Whipped Cream Reigns Supreme
There's a reason why culinary enthusiasts sing the praises of homemade whipped cream, and it boils down to an unparalleled sensory experience. When you craft your own coffee whipped cream from scratch, you're not just making a topping; you're creating an artisanal accent that dramatically outperforms its store-bought counterparts in every way:
- Superior Taste: Store-bought whipped creams often taste artificial and overly sweet. Homemade versions, especially when infused with real coffee flavor, offer a clean, rich, and balanced taste that’s simply unmatched. You control the sweetness and intensity of the coffee, tailoring it perfectly to your palate.
- Unparalleled Texture: The texture of homemade coffee whipped cream is the stuff of dreams. It’s exquisitely smooth, velvety, and light as air, dissolving delicately on your tongue. Unlike the sometimes gummy or overly dense texture of commercial varieties, homemade cream achieves a cloud-like consistency that feels incredibly luxurious.
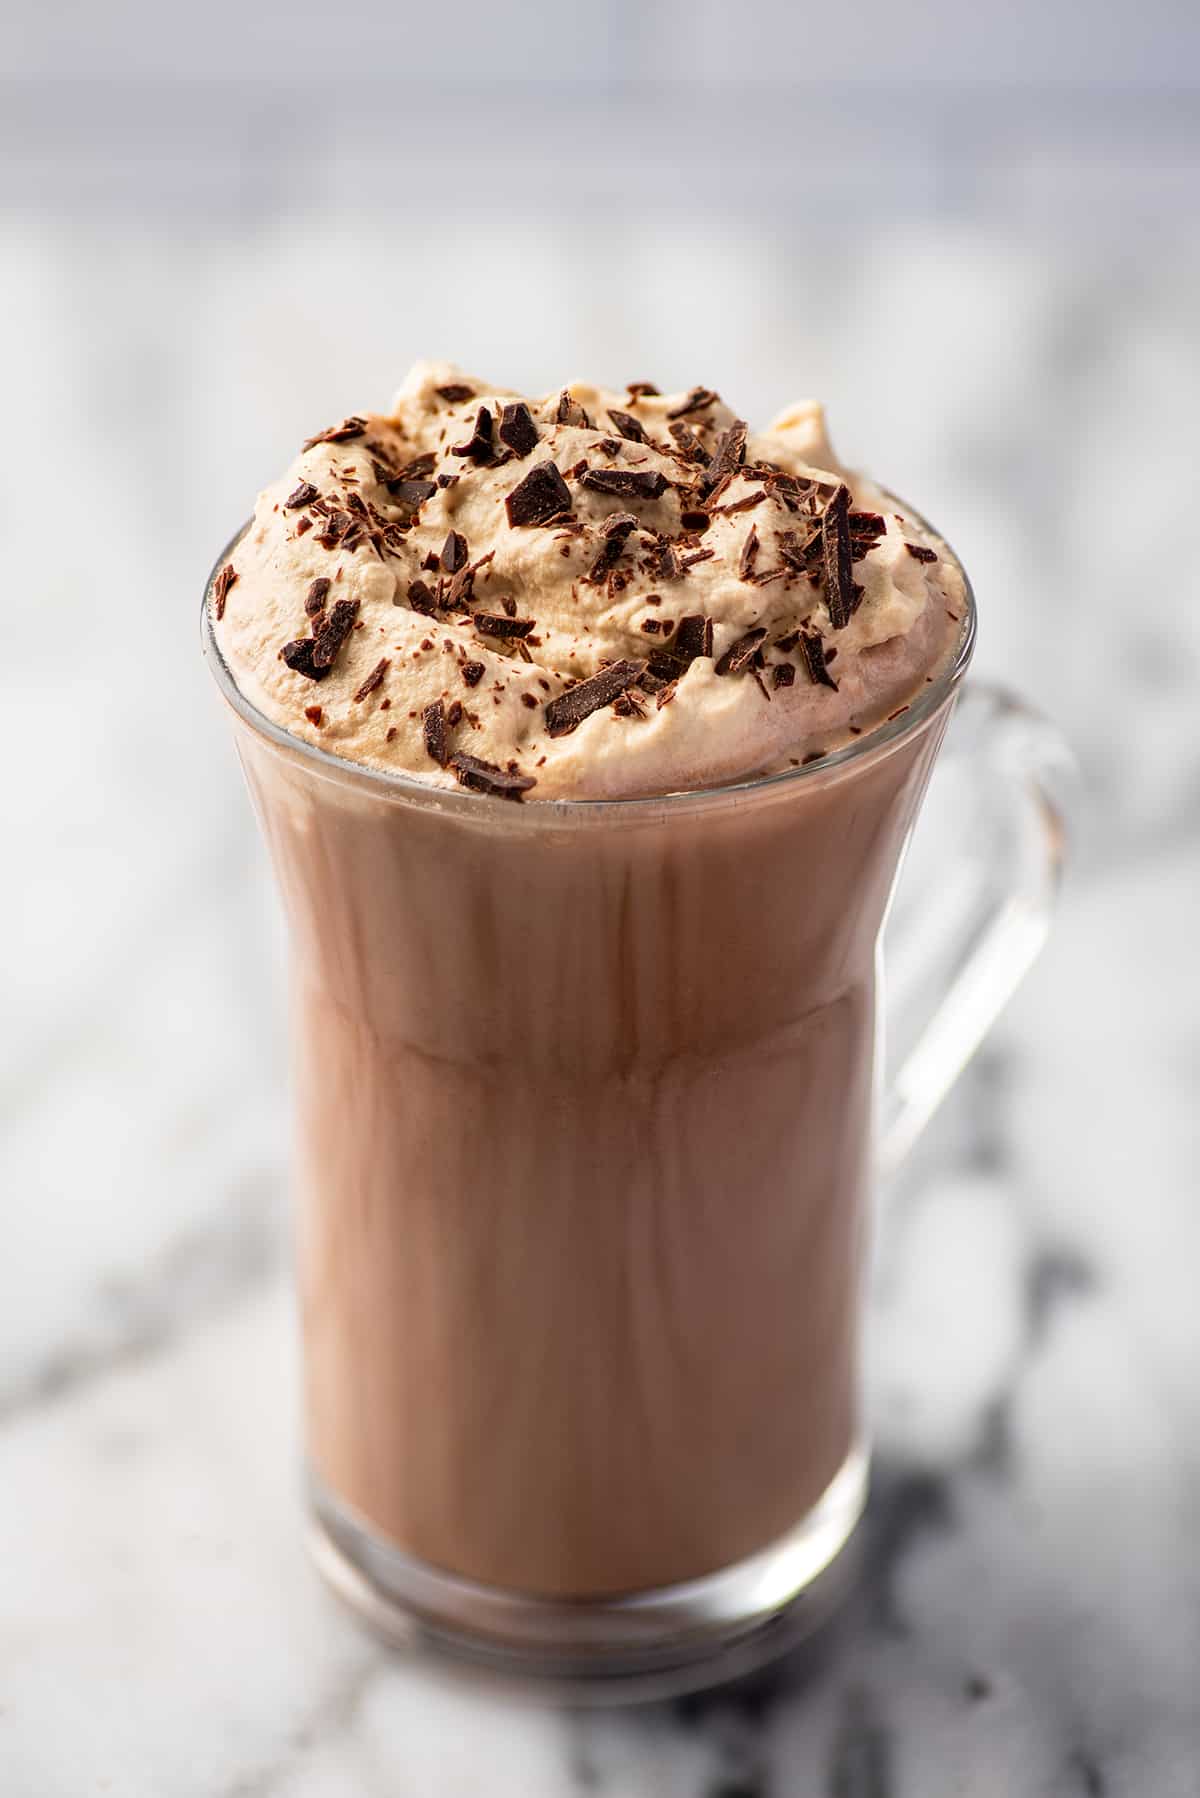
- Visual Appeal: A dollop of this beautiful, lightly coffee-brown whipped cream isn't just delicious; it's a feast for the eyes. Its ethereal lightness provides a stunning visual contrast to dense cakes, gooey brownies, or the dark richness of your coffee. It instantly makes any dessert or drink look more sophisticated and inviting.
- Versatility: While perfect for coffee, this whipped cream is incredibly versatile. It's a fantastic accompaniment to virtually any dessert, from fruit pies and chocolate cakes to ice cream sundaes and waffles. It even tastes incredible straight out of the bowl – we won't tell!
The difference is so profound, it’s not just a preference; it’s a fact. Once you experience the delightful flavor and ethereal texture of homemade Elevate Desserts & Drinks: The Ultimate Coffee Whipped Cream Guide, you'll be hard-pressed to go back.
The Essential Ingredients: Your Trio to Fluffy Perfection
The beauty of this recipe lies in its simplicity. You only need three core ingredients to create spectacular coffee whipped cream. However, understanding why each ingredient is important and choosing the right quality will make all the difference in achieving that coveted fluffy perfection.
1. Heavy Whipping Cream (or Heavy Cream)
- The Golden Rule: Always use very cold heavy whipping cream, ideally with at least 35% milkfat. The higher the fat content, the more stable and luxurious your whipped cream will be. Anything less will not achieve the same fantastic texture or level of stability.
- Why Cold Matters: The secret to stability lies in the fat globules. When cream is cold, the fat globules are firm and can more easily encapsulate air bubbles when whipped. This creates a stable emulsion that holds its shape and prevents weeping. Warm cream simply won't whip up as effectively, resulting in a runny, unstable product.
- Pro Tip: For truly exceptional results, chill your mixing bowl and whisk attachment in the freezer for 10-15 minutes before you start. This extra step helps keep the cream cold during the whipping process, especially useful in warm kitchens.
2. Powdered Sugar (Confectioner's Sugar)
- Sweetness and Smoothness: Powdered sugar is the ideal sweetener for whipped cream. Its fine texture means it dissolves instantly and completely, leaving no trace of graininess. This ensures your coffee whipped cream is wonderfully smooth and creamy, enhancing the overall sensory experience.
- Stabilizing Effect: Beyond sweetness, powdered sugar also contributes to the stability of the whipped cream, helping it hold its peaks longer.
3. Instant Espresso Powder (or Instant Coffee Granules)
- The Flavor Powerhouse: This is the secret ingredient that truly amps up the coffee flavor without adding any liquid that could destabilize the cream. Instant espresso powder provides a concentrated coffee taste that dissolves perfectly into the cream, infusing it with that irresistible aroma and delightful hue.
- Why Instant is Crucial: It's important to use *instant* espresso powder or *instant* coffee granules. Regular coffee grounds or brewed coffee will not dissolve properly and will leave your whipped cream gritty, watery, or both. Instant varieties are specifically designed to dissolve readily, making them perfect for this application.
- Adjusting Intensity: You have full control over the strength of your coffee flavor. Start with the recommended amount and then adjust to your preference. A little more espresso powder will yield a bolder coffee punch.
Optional Flavor Enhancements
- Vanilla Extract: A dash of vanilla extract can enhance the overall taste, adding a layer of complexity without overpowering the coffee. It rounds out the flavors beautifully.
- Cocoa Powder: For a mocha twist, try adding a small amount of unsweetened cocoa powder along with your espresso. It’s heavenly!
- Cinnamon: A pinch of cinnamon can add a warm, spicy note that complements the coffee flavor wonderfully.
Mastering the Whip: Step-by-Step for Cloud-Like Consistency
Achieving perfectly fluffy coffee whipped cream is incredibly straightforward, but a few key techniques will guarantee success every time. Follow these steps, and you’ll be whipping up dreamy, cloud-like topping in no time.
1. Gather and Chill Your Tools
As mentioned, cold is your friend. Ensure your heavy whipping cream is straight from the fridge. For an extra edge, place your mixing bowl (preferably a metal one, as it stays colder) and whisk attachment in the freezer for 10-15 minutes before you begin. This helps maintain the cream's temperature, promoting better aeration and stability.
2. Combine Ingredients
Pour your very cold heavy whipping cream into your chilled mixing bowl. Add the powdered sugar and the instant espresso powder (or instant coffee granules). If using, add vanilla extract or other optional flavor mix-ins like cocoa or cinnamon.
3. The Whipping Process
- Equipment: A stand mixer fitted with a whisk attachment is ideal for speed and consistency, but a hand mixer works just as effectively.
- Start Slow, Then Speed Up: Begin whisking on a low speed to incorporate the ingredients and avoid splattering. Once the sugar and espresso powder are mostly dissolved, increase the speed to medium-high.
- Whip Until Stiff Peaks Form: Continue to whip for approximately 3-4 minutes on medium to medium-high speed. The cream will gradually thicken, passing from soft waves to distinct peaks. You're looking for stiff peaks. This means when you lift the whisk, the peak of cream holds its shape firmly without drooping.
- Why Stiff Peaks? Reaching stiff peaks is crucial for several reasons. Firstly, it ensures that the instant coffee granules have fully dissolved, preventing any gritty texture. Secondly, it provides the thick, smooth, and stable consistency needed for piping onto cakes, pastries, or creating that impressive dome on your coffee. Don't stop at soft peaks if you want your whipped cream to hold its structure beautifully!
- Avoid Over-Whipping: While stiff peaks are the goal, be careful not to over-whip. Continue past stiff peaks, and your cream will become grainy, then separate into butter and buttermilk. Keep a close eye on it, especially towards the end of the whipping time. Stop as soon as those firm, proud peaks form.
It truly could not be easier or more delicious! For a quick walkthrough, check out our guide on Whip Up Dreamy Coffee Whipped Cream in 5 Mins: 3 Ingredients.
Storing Your Coffee Whipped Cream: Freshness and Longevity
Once you've made a batch of this delightful coffee whipped cream, you might have some leftovers (though we doubt it!). Proper storage ensures you can enjoy its fluffy perfection for longer.
Refrigeration
Freshly made coffee whipped cream can be stored in an airtight container in the refrigerator for 2-3 days. While it will still be delicious, it may lose some of its initial volume and stability over time. For the best texture, always remember to re-whip chilled cream briefly before use. A quick whisk with a fork or hand mixer will bring back its fluffy consistency.
Freezing for Longer Enjoyment
Yes, you can freeze whipped cream! This is a fantastic way to prepare ahead or prevent waste. Here’s how:
- Pipe or Spoon Dollops: Using a piping bag (with a star tip for extra flair!) or simply a spoon, create individual dollops of whipped cream onto a parchment-lined baking sheet.
- Flash-Freeze: Place the baking sheet in the freezer for 2 to 4 hours, or until the whipped cream dollops are solidly frozen. Flash-freezing prevents them from sticking together and helps them maintain their shape.
- Transfer to Container: Once frozen solid, transfer the individual dollops to an airtight, freezer-safe container or a resealable freezer bag. This will prevent freezer burn and protect them from absorbing other freezer odors.
- Storage Duration: Frozen coffee whipped cream can be stored for 1 to 2 months.
- Thawing and Re-whipping: To use, simply transfer the desired number of frozen dollops to a plate or shallow dish and thaw them overnight in the refrigerator. While they may not be quite as stable as freshly made cream, they will still be wonderfully flavorful. A quick re-whip after thawing can help restore some of their initial fluffiness.
This freezing method is perfect for having an instant luxurious topping ready for unexpected guests or a quick dessert craving.
Creative Ways to Enjoy Your Coffee Whipped Cream
The beauty of homemade coffee whipped cream lies in its incredible versatility. While it's a match made in heaven for coffee, its uses extend far beyond your morning mug.
- Elevate Your Coffee: The most obvious, yet most satisfying. Top hot lattes, cappuccinos, iced coffees, or cold brews for a barista-quality drink at home. The contrast of the cold cream on hot coffee is sublime.
- Dessert Dynamo:
- Pies & Tarts: A perfect complement to apple pie, pumpkin pie, pecan pie, or even a simple fruit tart.
- Cakes & Brownies: Transform chocolate cakes, vanilla cupcakes, or gooey brownies into extraordinary treats. Its lightness provides a beautiful contrast to denser baked goods.
- Ice Cream Sundaes: Take your sundae game to the next level by swapping regular whipped cream for this coffee-infused delight.
- Hot Chocolate: Swirl a generous dollop into hot chocolate for a decadent mocha-style beverage.
- Fruit: Serve with fresh berries, sliced bananas, or a fruit salad for a lighter, yet indulgent dessert.
- Breakfast & Brunch:
- Pancakes & Waffles: Ditch the syrup sometimes and add a spoonful to your stack of pancakes or waffles.
- Crepes: Fill sweet crepes with fruit and a dollop of coffee whipped cream.
- Straight from the Bowl: Honestly, sometimes the best way to enjoy it is with a spoon, savoring every fluffy, coffee-infused bite. Live your best life!
Don't be afraid to experiment! The possibilities are endless for incorporating this delicious, cloud-like topping into your culinary creations.
Mastering homemade coffee whipped cream is a culinary superpower that takes just minutes to achieve. With simple ingredients and a few key techniques, you can transform everyday drinks and desserts into indulgent experiences that taste truly gourmet. From the intensely rich flavor of instant espresso to the ethereal fluffiness created by chilled heavy cream, every element plays a vital role in achieving that perfect, cloud-like consistency. So go ahead, treat yourself and those you love to this remarkably easy yet profoundly satisfying homemade delight. Your taste buds will thank you.
